


Welcome!
Learning the tools of different apps is not easy. I’ve been using ProCreate for a couple years, and have used Affinity Designer, too. I’m digging deeper in the use of both of them to create repeating patterns for POD [print-on-demand] sites. I’m including that learning in my Wednesday posts. Today, I share my practice session using Affinity Designer.
Inspiration
I joined Liz Kohler Brown’s The Studio, which includes a community and art courses in both Affinity and Procreate: a great combination. I’ve still not finished my “mallow mistake” because I decided just to practice what had learned a few years ago to get used to the Affinity Designer tools: vector pencil and brush to draw and texturize, navigation tool for organizing the pattern, and the diamond/damask pattern.
But what could I draw? Well, Liz has a challenge each month, and this month the topic is “Interesting Plants.” Week 1 was Tropical plants and Week 2 is Edible plants. Liz provides a list of public domain images from which to gather ideas or inspire your own. I choose the tropical caladium plant and the edible kumquat for my motifs, and to create a diamond pattern with them, which I had reviewed in the damask pattern course.
My Process
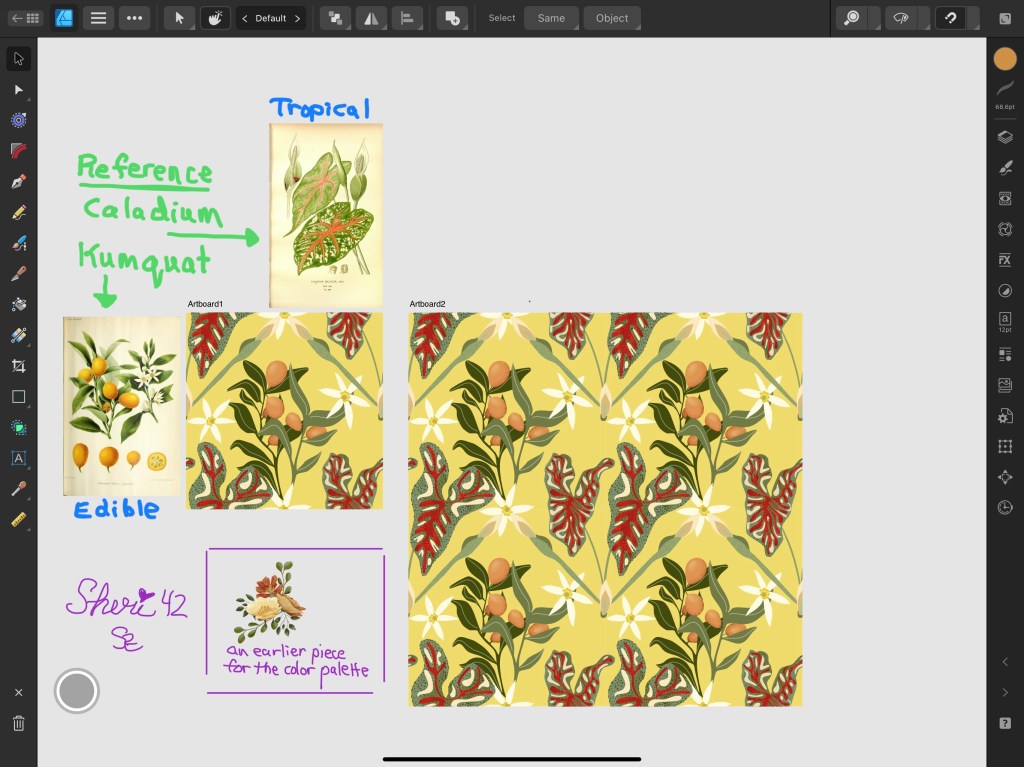
I started with a template I’d made a couple years ago that provides a working canvas and a “symbols” canvas, double the size to watch the pattern grow from the working to the symbols canvases.
I brought in the reference photos and an illustration I’d made earlier from which to use the ink dropper tool to build a palette.
I started with the caladium, which is a poisonous, though interesting and lovely plant. I studied the plant shape– the leaves and the blossoms. I didn’t sketch first but just practiced with the pencil tool to draw and create the base of the plant stem and then the “elephant ears” leaves. Next I created the lower part of the diamond with the stem/blossom, just breaking the reference image illustration into parts that I could simplify with the pencil tool. The blossom is a separate part: center, inner shadow, and tan petals with a darker, drawn outline clipped to it. After I was finished with the whole piece, I decided to go back to the clipped outline and darken it even more to separate it from the white flower of the kumquat. It’s pretty easy: just open the layers, choose the outlines, chose the color.
I studied the illustration again to see what I could add– the red and the white in the leaves using the pencil tool again.
Next, I added texture with different brushes with the vector brush tool, adjusting the stroke color and size according to the parts of the motif I was applying the texture to: the elephant ear leaves, the red veins, and the stem of the blossom.
I closed this group of layers and duplicated the entire group, moving it with the navigation tool to the upper left quadrant of the diamond shape. I then duplicated that piece and with the navigation tool, entered the dimensions to move it over or down or both to create the corner pattern of the design.
I repeated all but the last step with the kumquat motif., using it’s white blossoms as details and an endpoint in the lower part of the diamond. I also played around with highlights on the kumquats, making three blurred layers from very light to darker orange, different blend modes, and lowering the opacity of all layers to blend it into the kumquat. I was pretty pleased with that effect, and I just made it up as I worked to create it.
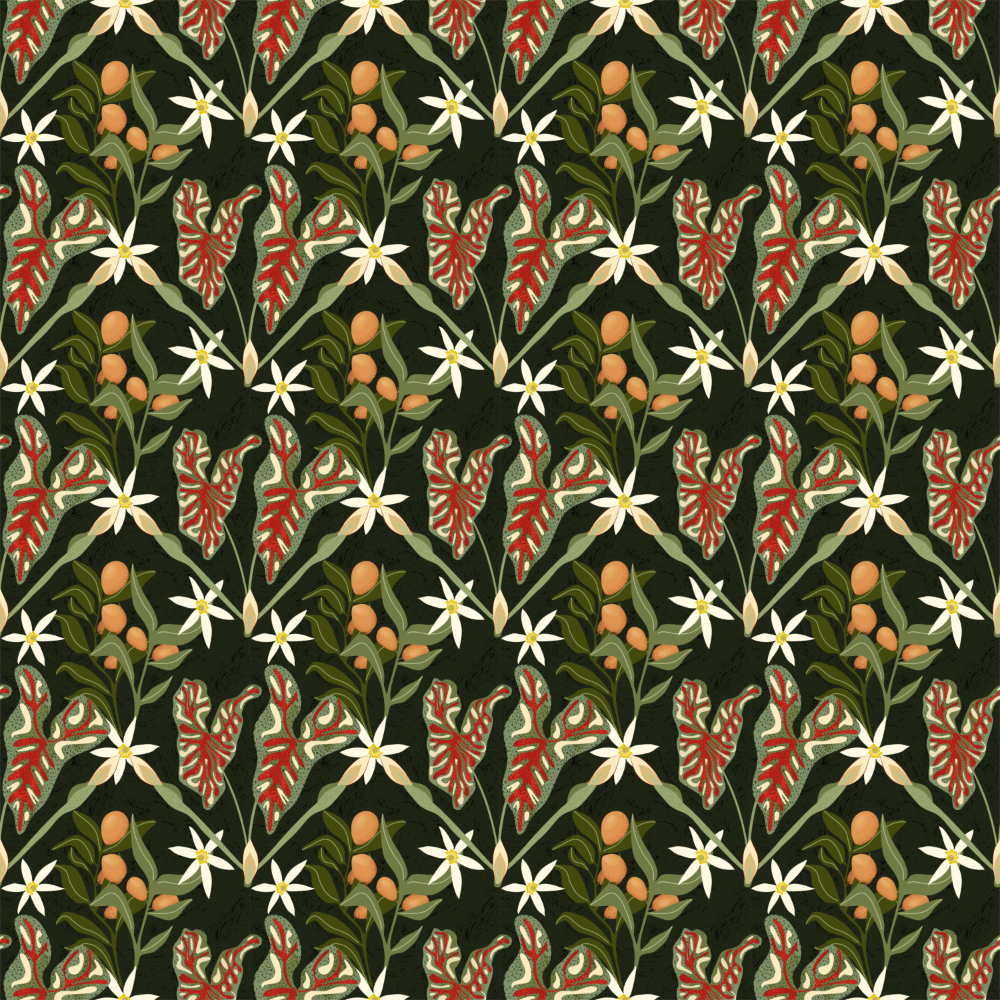
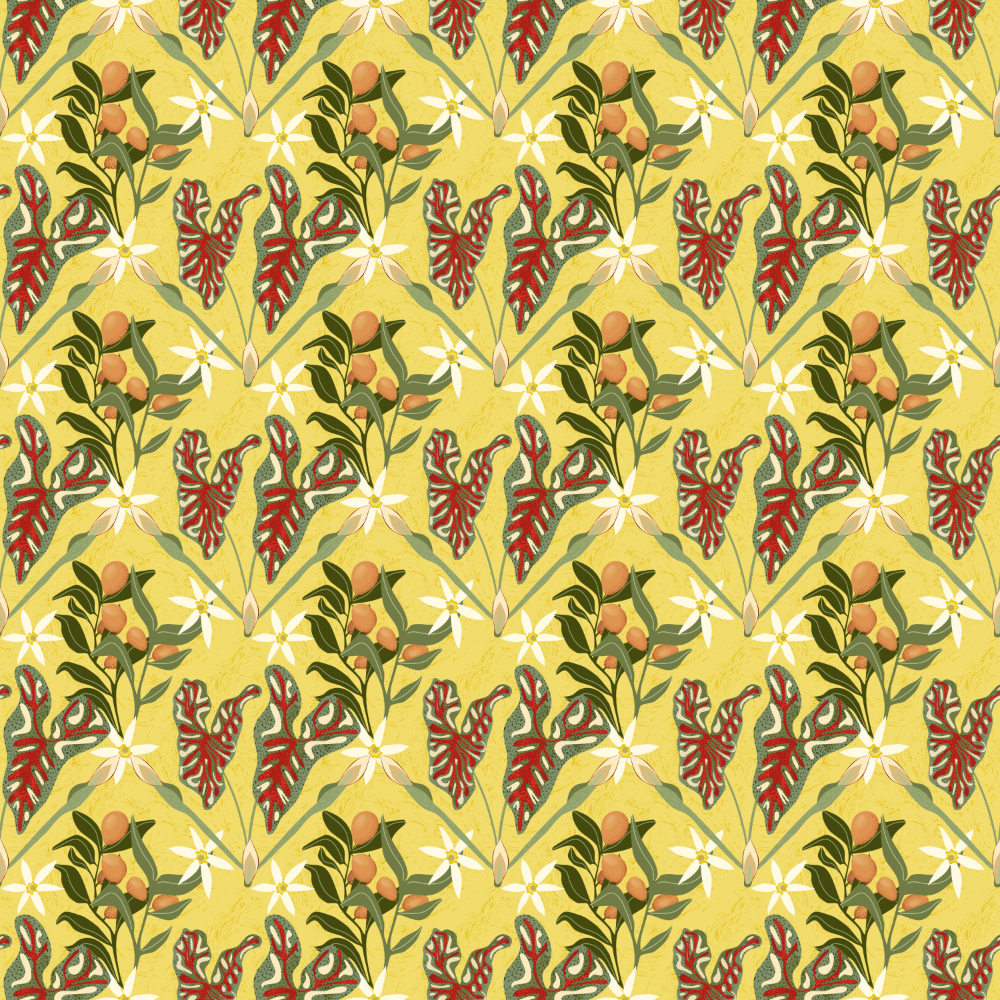
Finally, above the background color layers and below all the other layers, I added a texture image I had in my “assets” from prior lessons a couple years ago. I placed it into the “diamond” areas on overlay blend mode so it would blend with each of the colors I chose as background colors: cream, yellow, deep green.
You can see all three color versions in the gallery at the top of the page. What do you think? I did the first motif last night, and the second one this morning. I added them to my “Assets;” that’s another great thing about Affinity Designer: once you’ve drawn a motif, you can save it to your Asset Library to reuse as needed.

Try it!
Whether you try Procreate or Affinity Designer, give pattern making a try. There are plenty of YouTube videos to get you started. Or join a community like Liz Kohler Brown‘s or Jennifer Nichols to get started or to refine what you already know while belonging to an artist’s supportive community. That’s what I spent the last two days doing: refining what I know so I can dig deeper in further lessons and support in these two communities, which I’m very thankful for.
And share your process and reflection in your own blog: it helps keep the process in your mind as part of the learning.
I look forward to your sharing your experiences with surface design / patterns and hope this little post on a week of learning inspires you to start designing.
Please continue to be a part of the #warmup4art series to learn and enjoy our work together! See my sharing at IG @42Sheri and Twitter @42Sheri.
#thestudiobylizkbrown #clmooc #augustdoodle #cldoodle23 #warmup4art
