

Welcome!
For at least the next two weeks, this blog will host “Wednesday Warm Up,”— a day of usually quick drawing, inking, brushing as warm up to our serious art. I’ll share a strategy to try each Wednesday using the iPad app ProCreate. I will only use the brushes in the app— there are so many I haven’t tried that warming up with a new brush will be an added bonus and challenge.
I hope you enjoy this one that I call Unblind Contour! Art class— remember trying to look at and draw the outline of your hand without looking at your canvas? That’s today’s warm up, except choose something around you and you do get to look back and forth from your object to your canvas.
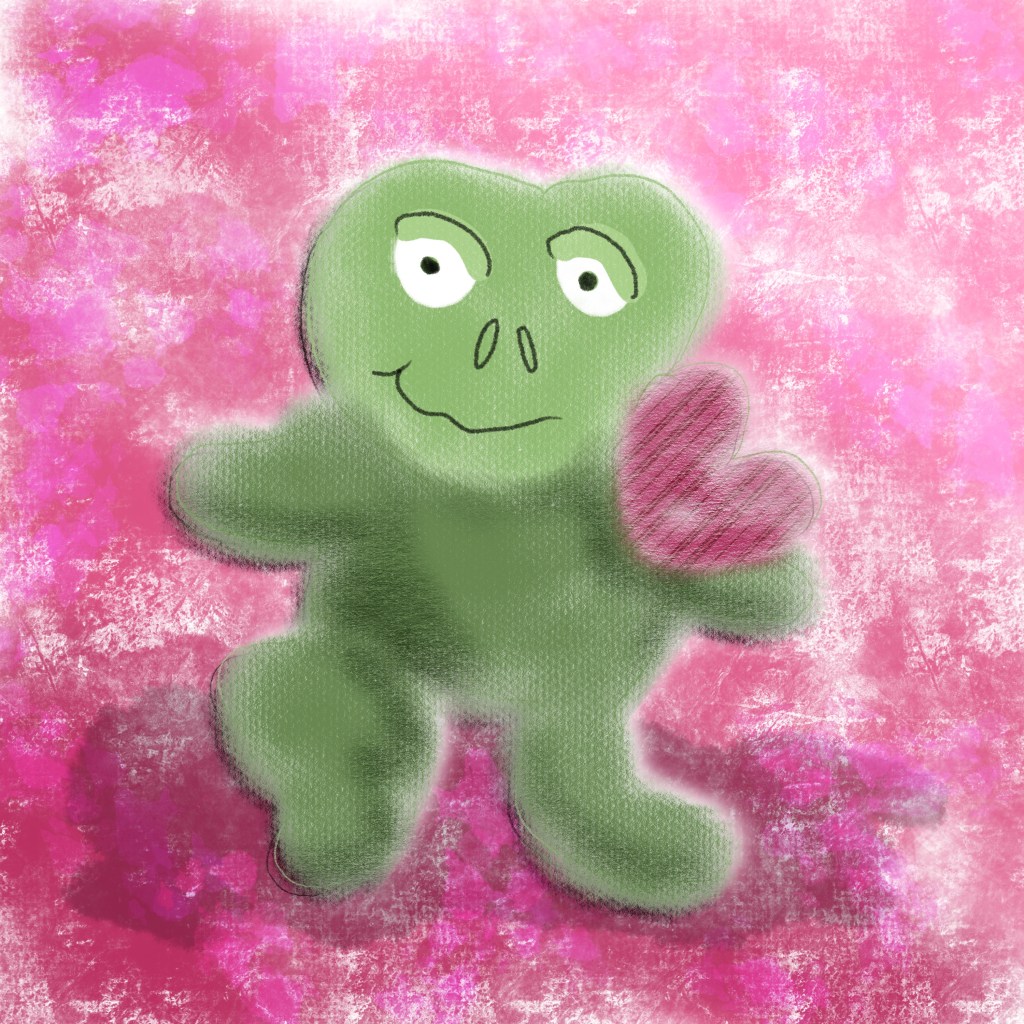
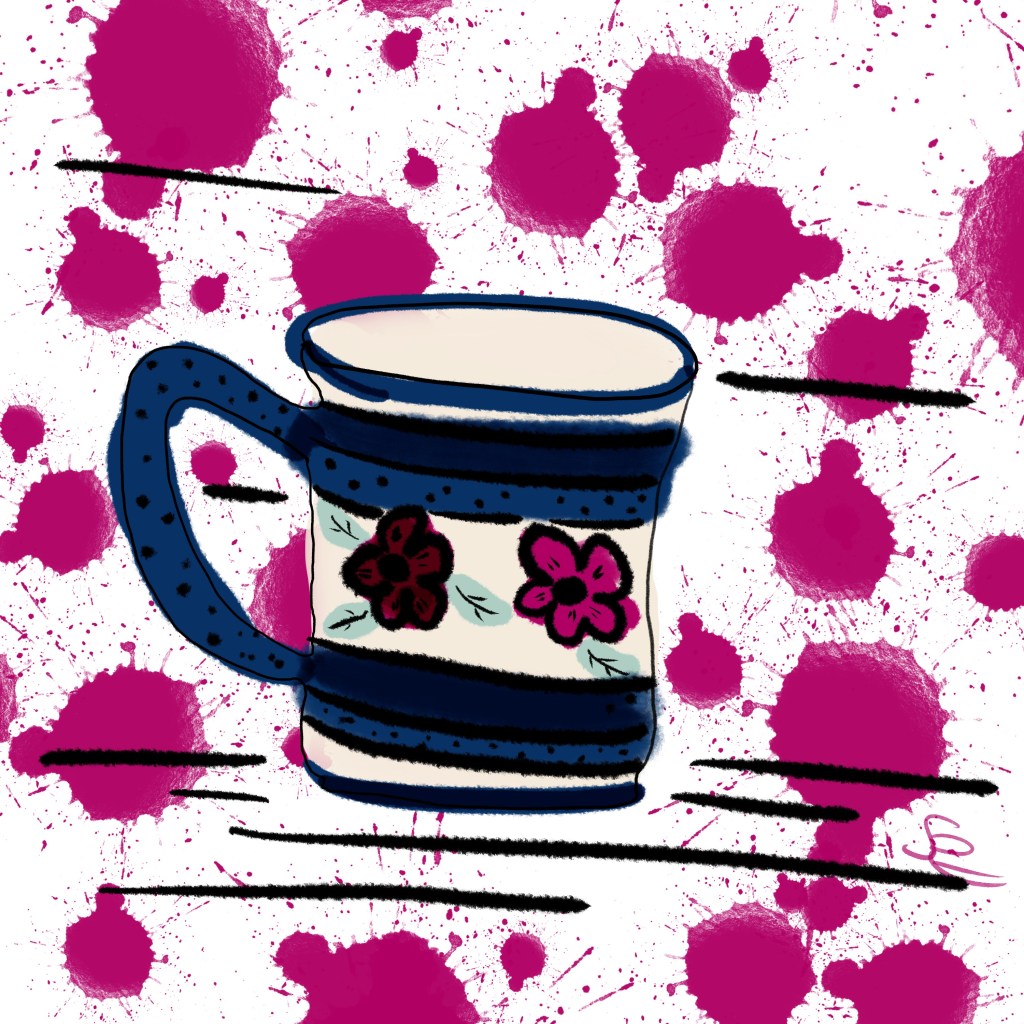
Goal: warm up the mind memory for drawing; freehand drawing to build a connection between your eye and your hand, a coordination between what you see and what you want to draw. And, we’ll try some new brushes– I’ll share mine, and you try your own. I’ve two to share this time: the frog and the cup.
The Process
1 Look around you– choose something around you to sketch, and remember that you can look back and forth.
What will object you choose?
- a cup
- a lamp
- a cabinet
- a lotion bottle
- the cat
- a building in a picture
- a person in a picture
2 Choose a messy pen with which to sketch, and don’t be perfect— be pretty fast. Focus on a starting point and begin drawing the outline – the outside edge around what you are drawing. Occasionally look at your drawing on your canvas— a back and forth so you develop the “eye” for seeing that outline.
3 Once you’ve got the outline, fill in a few details and color. Add some accent lines or splatters and sign that art!
That’s it—but I know you’re going to experiment a bit, like I did.
My Process
Warmups are a great place to try out new brushes.
For the cup, I tried the “marker” brush under Ink. Bad choice because the color overlays darker when you recolor, and increasing the size brings out more fuzz— hence the dark blue parts— but that was my choice, my warm up. That’s how I learn about the brushes.
CUP BRUSHES
- draw: inking brush- marker
- Color fill: same marker
- another layer for black outlines with inking —ink bleed
- for cup fill: airbrushing– hard air brush
- water brush: blotch for splatter
Lots of splatter because the blotch brush is awkward. So I played with the brush settings, and did the following so I could just get one splat where I tapped:
For the blotch brush, I duplicated the ProCreate blotch brush, then I changed these settings so that it would just blot once wherever I tapped:
- Stroke path: turn jitter off
- Grain: turn to Zoom to follow size [left]
- Under Properties:
- smaller preview
- larger maximum size
- larger minimum size to 26%
- About: name and create new reset point
Fast and fun, I’m not impressed with the result, but happy to learn more about the different brushes– and how to change them.
FROG Brushes and Process— I experimented quite a bit here:
BRUSHES:
- Sketching: Sketching–Derwent
- Frog Fill: Sketching–Soft pastel and shade with graphite shading
- I forgot to add a new layer for the fill and shade on the frog, but from here on, I worked on new layers for each part.
- I did like how the soft pastel left a texture that matched the cloth of the stuffed frog
- Heart Fill Sketching–graphite shading; Texture–Diagonal on clipping mask on multiply
- Eyes: Painting–Spectra with blend mode screen
- Nose/mouth: tried Painting–Oil switched to Sketching–Peppermint
- Background Texture–Grunge
After the sketch and fill were completed, I duplicated the frog and the heart and merged the duplicated layers. Alpha lock that layer and filled with white set to “screen.”
Duplicated that layer twice, still on “screen.” Merged these two layers and transformed them up and to the right, applying a slight Gaussian blur [undo the alpha lock first].
Back to the original white frog/heart layer to duplicate it and fill black, setting the blend mode to black. Transform it down and to the left, just slightly for a shadow. You could also apply a slight blur to this, but I did not.
On the background layer, I freehand selected the top right diagonal area and with the adjustment tool on Hue, Saturation, and Brightness [and feathering about 40%], I lightened the area slightly, to about 55.
I repeated that process but darkened beneath the frog.
I tried the Artistic–Wild Light to shade in black beneath the frog, setting it to multiply and 22% opacity. It’s a very intense brush.
And, to totally try something new— I chose the frog green color and the Artistic–aurora brush on 57% opacity and 53% size to splash on some spots. I tried several blend modes and settled on “divide” because it added a neon pink in the shadows below the frog.
Give it a try
Try the unblind contour drawing and a few new brushes. Let us know what we should try next! Please remember to share #warmup4art .

1 thought on “Wednesday Warm Up Unblind Contour”