


Welcome!
For the past few weeks, this blog has hosted “Wednesday Warm Up,”— a day of usually quick drawing, inking, brushing as warm up to our serious art. I share a strategy to try each Wednesday using the iPad app ProCreate. I only use the brushes in the app— there are so many I haven’t tried that warming up with a new brush will be an added bonus and challenge.
This Week
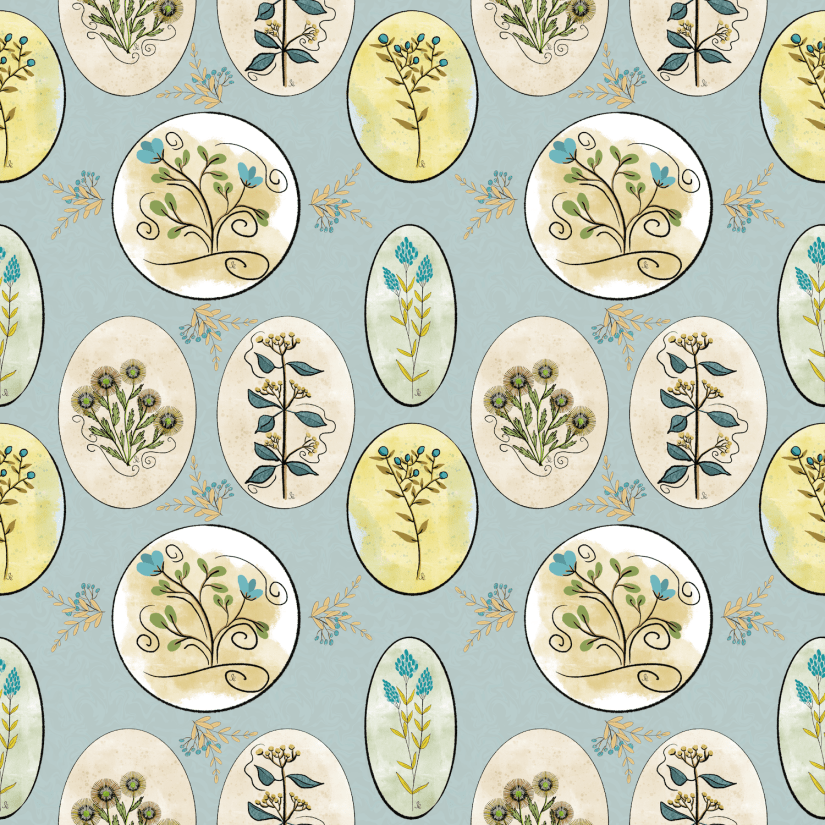
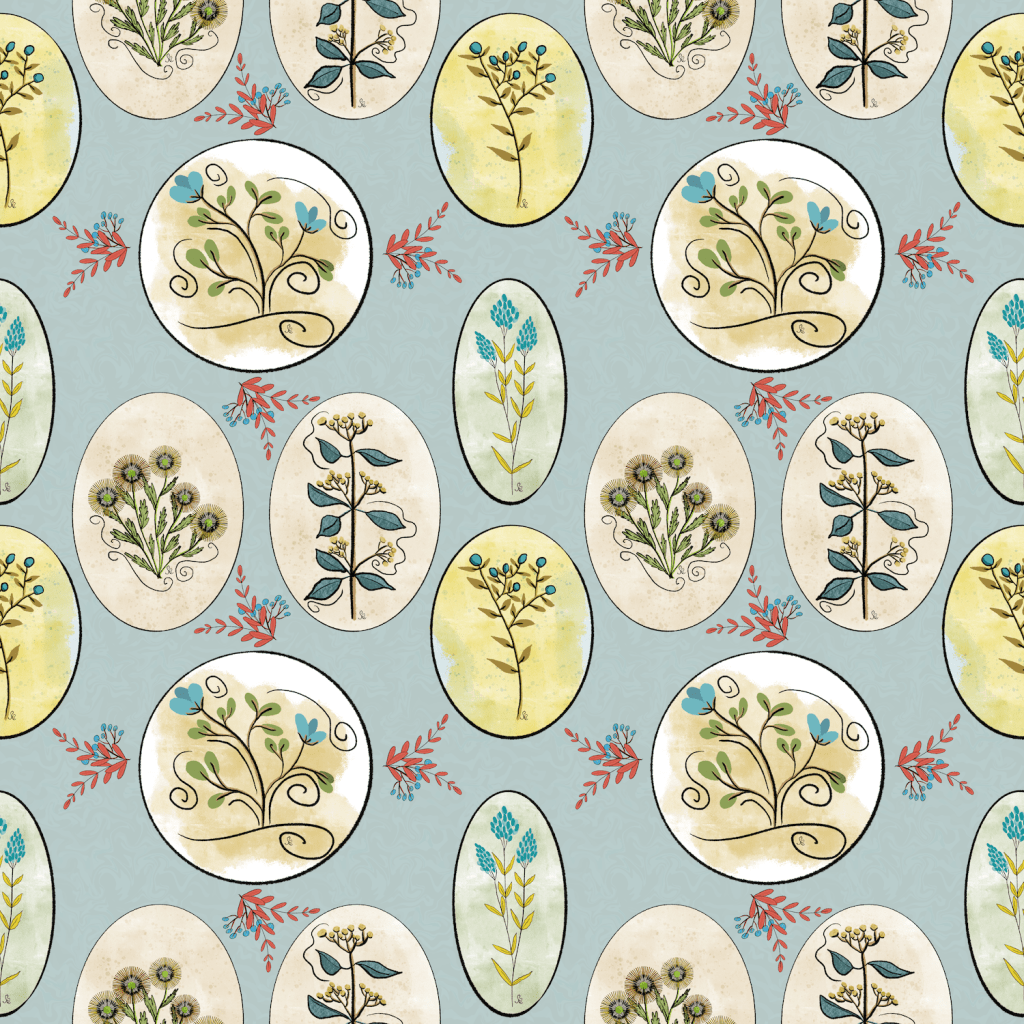
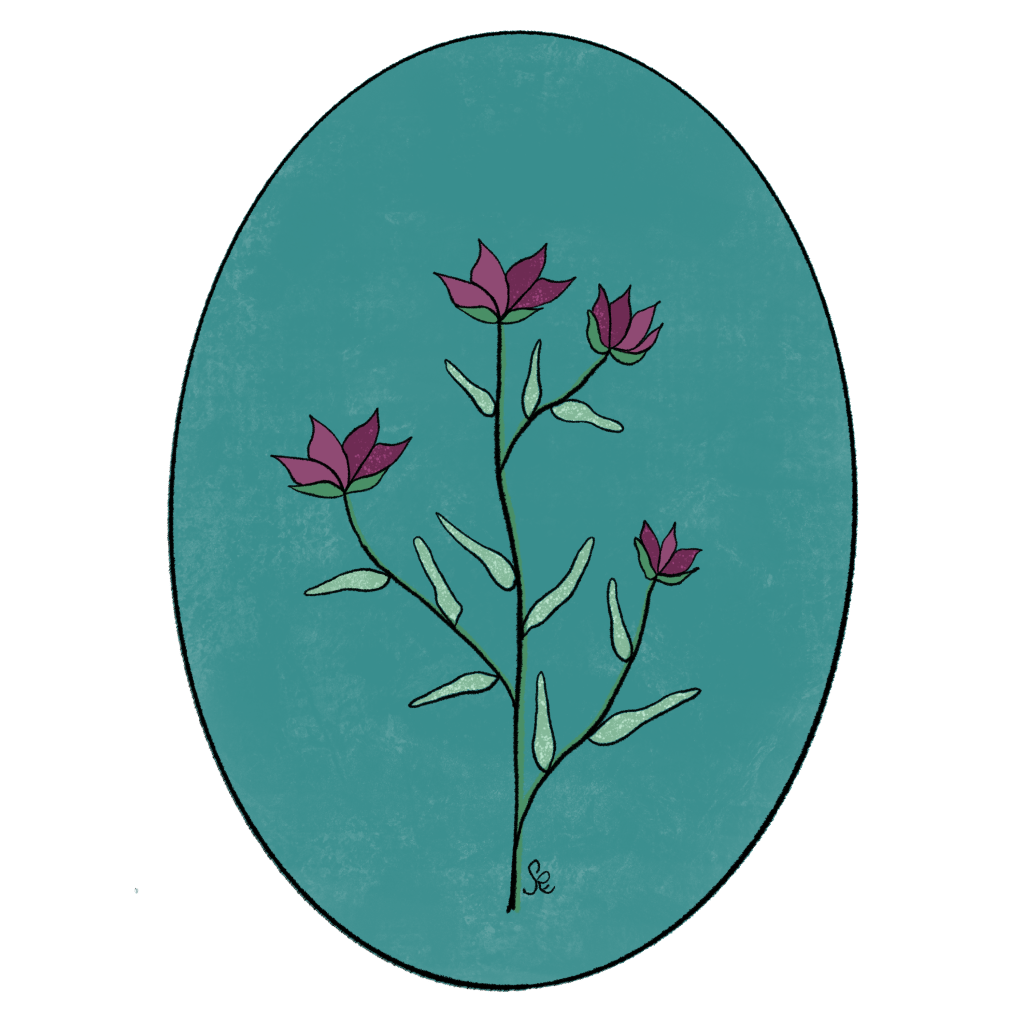
This week we’ll look at the same quick florals from last week, but with a twist. If you haven’t looked at that post, you might want to since not all the “jazzy” parts are discussed here. This week we’ll focus on the process and on making the “frame” the same size. First, let’s look at how I arrived at this change in my quick floral warm up.


The Goal
So today’s goal is to practice smooth lines and your favorite floral shapes in a quick style, and to standardize the size so after a week of just fun, relaxing warmups, a pattern or other collection to sell could be created! I know I’ll be revising this idea even more– and I appreciate any ideas you have for further adaptations!
The Process
Reference Photos
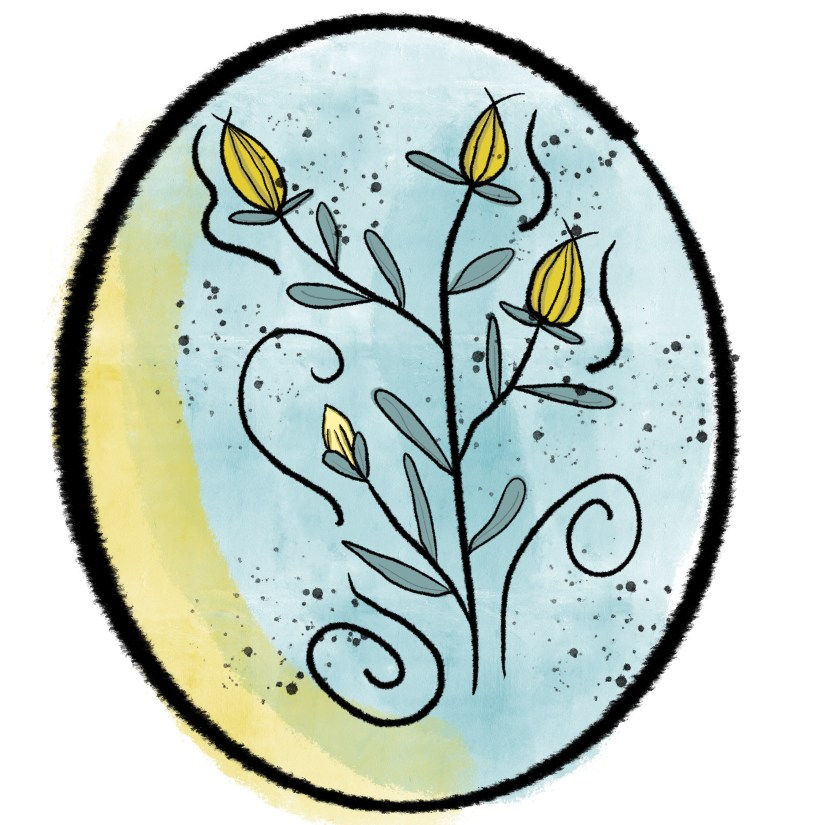
First things to do is find some reference photos for the florals you want to draw. I used the final image I created for Teela’s class for my reference photo. You’ll notice the third floral is my model for demonstration, adapted a bit and purple. The other flowers in my video are other adaptations. If you need a good reference book, I love this one recommended by my artist friend, Susan Watson: 20 Ways to Draw A Tree by Eloise Renouf.

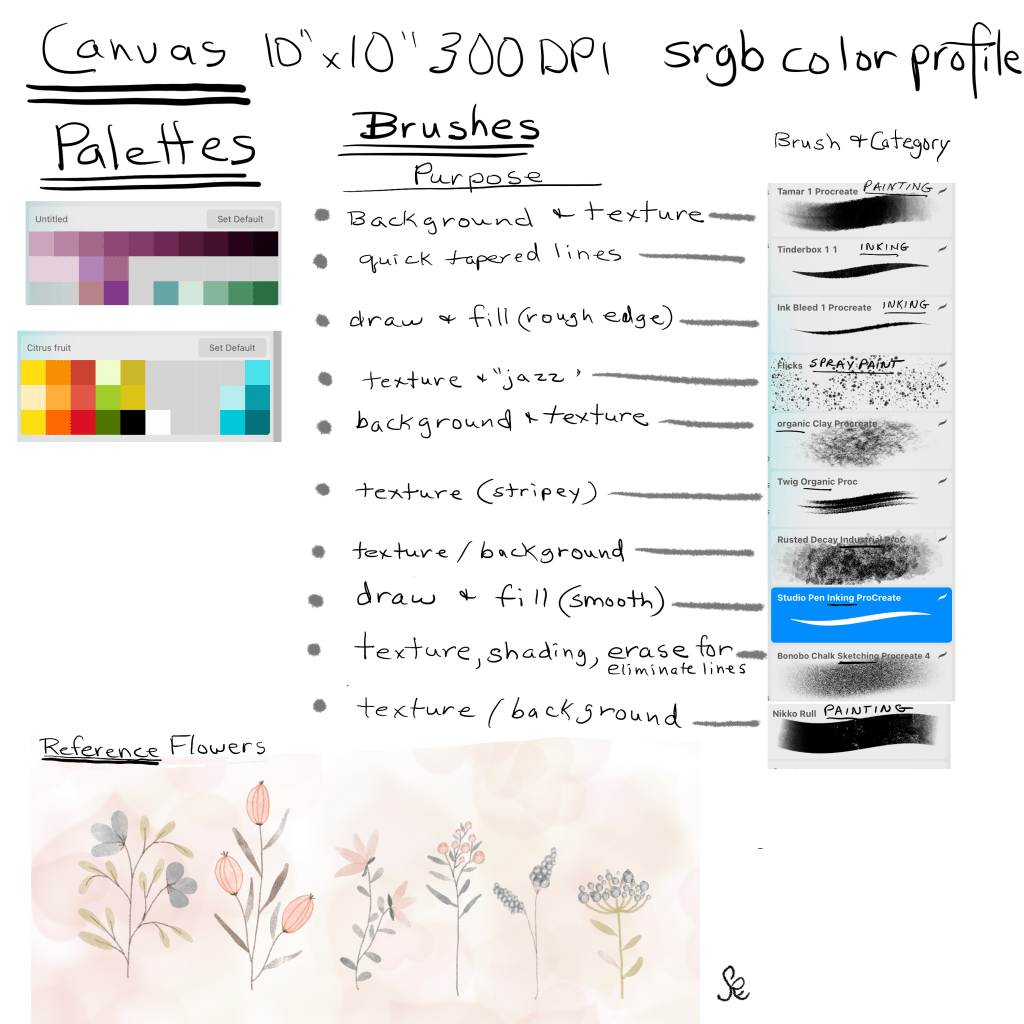
Canvas, Palettes, Brushes


Steps in Process

Explanation of Steps:
- Set up canvas, reference photo, palettes, brushes.
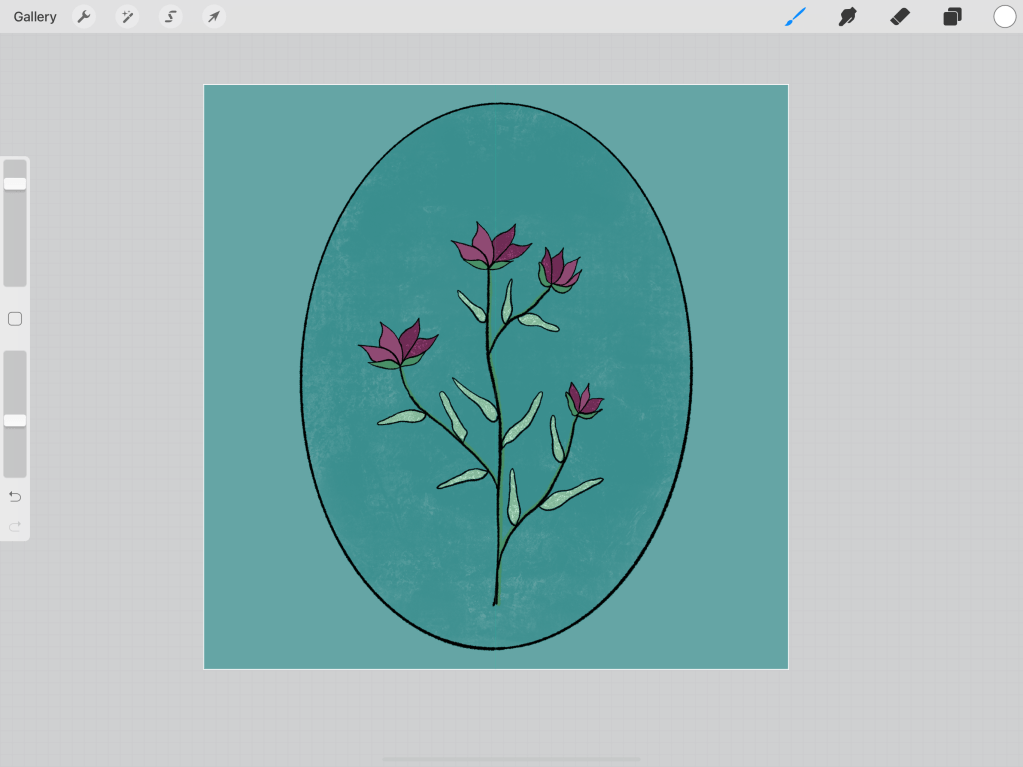
- Start with the oval frame above —reference layer; create to size needed; duplicate and move when needed for next floral group. [Ink bleed or Studio Pen]
- Add layer above frame and begin outline drawing stems/sepals. [ink bleed]
- Add another outline layer for petals.[ink bleed]
- Add color layers [ink bleed]– each color a different layer below outline. Start with stem and sepals.
- Add color for leaves.
- Add details / texture with clipping masks for color layers — example: leaf spots or streaks [ink bleed, flicks, clay, twig, rusted decay, bamboo chalk]
- Add color layer for light petals. [ink bleed]
- Add color layer for dark petals. [ink bleed]
- Add clipping mask to dark petals for petal specks. [flicks]
- Fill layer for color background
- Above color background, add texture layer on a blend mode to your liking [multiply, color burn] of same color as background. [rusted decay, clay, nikko rull, or tamar]
- Add a lowest layer and fill with white [this fills in color for brushes/layers that may show through to transparency layer].
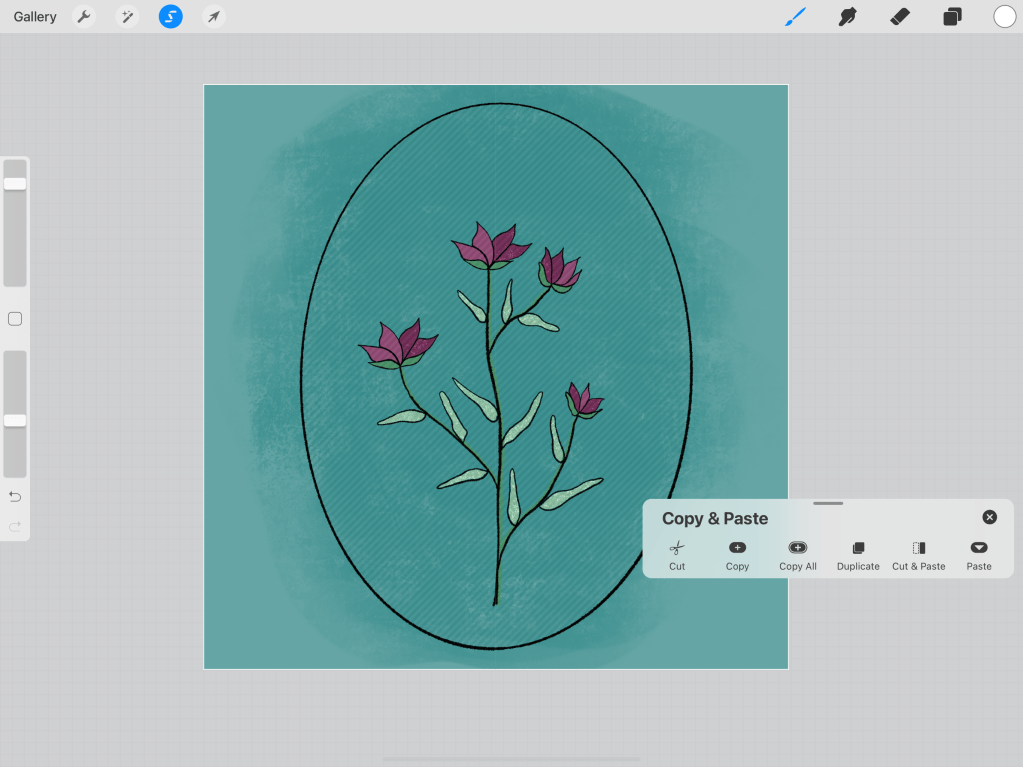
- Go to frame layer. Choose SELECT and select the OUTSIDE of the frame.
- Go to texture layer with SELECT still on, three finger swipe, CUT. This cuts the outside area around the frame.
- Repeat the SELECT/CUT process for the two background color layers.
- Add your signature!
- Repeat the process for new floral.
Explanation of Final Frame Creation Using Selection Tool


Advice?
I just love creating these– they are so fast and fun. Please share any ideas or your own creations based on this. Find me on Instagram here: @42Sheri Please remember to share #warmup4art .
I look forward to your shares!

Wonderful
LikeLike