

Welcome!
For the past few weeks, this blog has hosted “Wednesday Warm Up,”— a day of usually quick drawing, inking, brushing as warm up to our serious art. I share a strategy to try each Wednesday using the iPad app ProCreate. I only use the brushes in the app— there are so many I haven’t tried that warming up with a new brush will be an added bonus and challenge.
The Goal
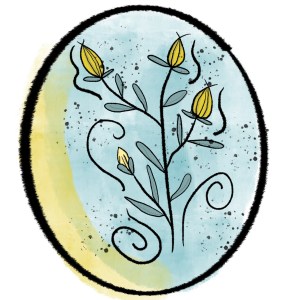
Today’s goal is to practice smooth lines and your favorite floral shapes. We’ll add a bit of whimsy and at the last minute, I decided to add a quick frame as well. It’s all quick, not too much worry about process.
This warmup may become one of your “styles,” and I learned some of this style from two teachers on Skillshare. If you look around if you don’t belong, you get two weeks free here.
The “jazzing” up of the art is from Brenda Bakker’s Skillshare class: Create Sketchy Doodles. So many of us newbies are so enjoying the fun of her process, letting go of “perfectionism.” You will love this class– my project. After that class, I created this “Card for You” download and blog post.
The other great class on florals is from Teela Cunningham’s Intro to Watercolors in Procreate. I used the final project I created for this class for my reference florals.
This looks like a lot– but it goes very fast once you’ve got the process down. I love these warmups– they often become gifts and postcards!
The Process
Reference Photos
First things to do is find some reference photos for the florals you want to draw. I used the final image I created for Teela’s class for my reference photo. You’ll notice the second floral is my model for the yellow illustration above, and the first blue flower is the other model for this warmup.
Palette
Next, have your palette chosen so you’re not taking time deciding on colors. A palette gives you a starting place and also forces you to be creative and think outside the box. I know, that as a novice artist, I try to work in “realistic” mode, when I really want to just create an “illusion” of life, something not perfect, but recognizable as a statement of the world.
My Palette:

I found a picture with soft white and yellow colors with a teal background and used that to “create a palette from a photo,” a new tool in Procreate.
Canvas and Brushes
Next, the canvas: 10 x 10 inches at 300 DPI, and the brushes I’ll use are by category:
Painting Tamar
Inking Ink Bleed
Spraypaint Flicks

I chose the “ink bleed” brush because it is a rough line, like an old pencil or brush– not perfect. The Procreate brush is nice because the size varies for lines and fill. If you find you can’t get a large size for the fill, you can fix that. Here’s how:
- Go to your Ink Bleed brush. Swipe to the left and choose, “Duplicate.” This way, you don’t affect the native brush.
- Now tap your duplicated brush to open up the settings.
- Click on “Properties.”
- Go to “Brush behavior” and set the maximum size up higher. You can play around with this as you go. I actually have a brush I named “Ink Bleed Large” because I increased the size to 61% and it gets a very nice size for filling.
- Click on “About this brush” and rename it to fit your new settings. Add your name and signature.
- Click “Create new reset point.”
- Click “Done.” You now have your first brush.
I import the photo for reference on the bottom layer; I know I could use the “reference” tool or have side by side, but I only need it for the first outline portion and I want it right there while I draw.
It might be helpful to skip down to the video and then back up to follow the process. You know your own style for learning!
Illustration
Now to get started. I snapped this picture of the layers for my yellow floral image. The layers are not in the order I created them, of course– they are in the order needed to create the image:
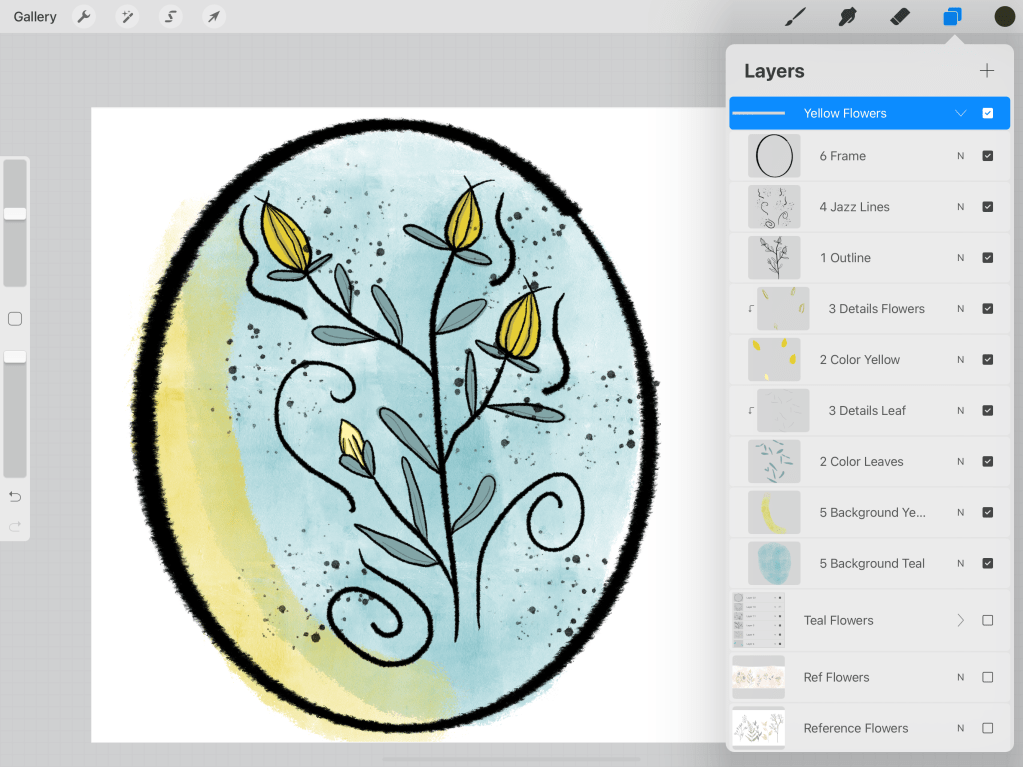
Layer for creating illustration:
- Outline at top
- Below outline, each color on a separate layer [or, if the colors do not touch, that works, too, on the same layer]
- Clipping masks for details and texture connected to color layers
- Lowest layer is background
- Above outline or just under: jazzy lines and splatters, as desired
- Above outline or just under: frame
Layer order for drawing:
Before illustrating the outline, I added a layer with image for reference florals [notice it is unchecked, hidden in image] now. I unhide it as reference to start the outline.
- Add layer above reference photo and begin outline drawing. [ink bleed]
- Add color layers [ink bleed]
- Add details with clipping masks for color layers [ink bleed]
- Add a layer above the outline and add “jazz curves or straight lines” to add movement and jazz up the image [ink bleed]; add some splatters [flicks]
- Add the lowest layer– the background splash [tamar] I used both yellow and blue. That was an accident. I decided to add the frame and the blue didn’t fill all the way, so I added a yellow stroke with the tamar brush.
- Add a layer at top to add a frame with ink bleed. Quickly draw the round or oval or rectangle shape and hold the pen down for the app to create an auto shape. Adjust to fit.
I just love creating these– they are so fast and fun. I’m especially thankful for Brenda and Teela for their inspiration. Now, have they inspired you? Consider taking their classes — they each have several, and you will be finding your own new style and warm ups! Please remember to share #warmup4art .


3 thoughts on “Wednesday Warmup Florals”