


Watercolor in Affinity Designer
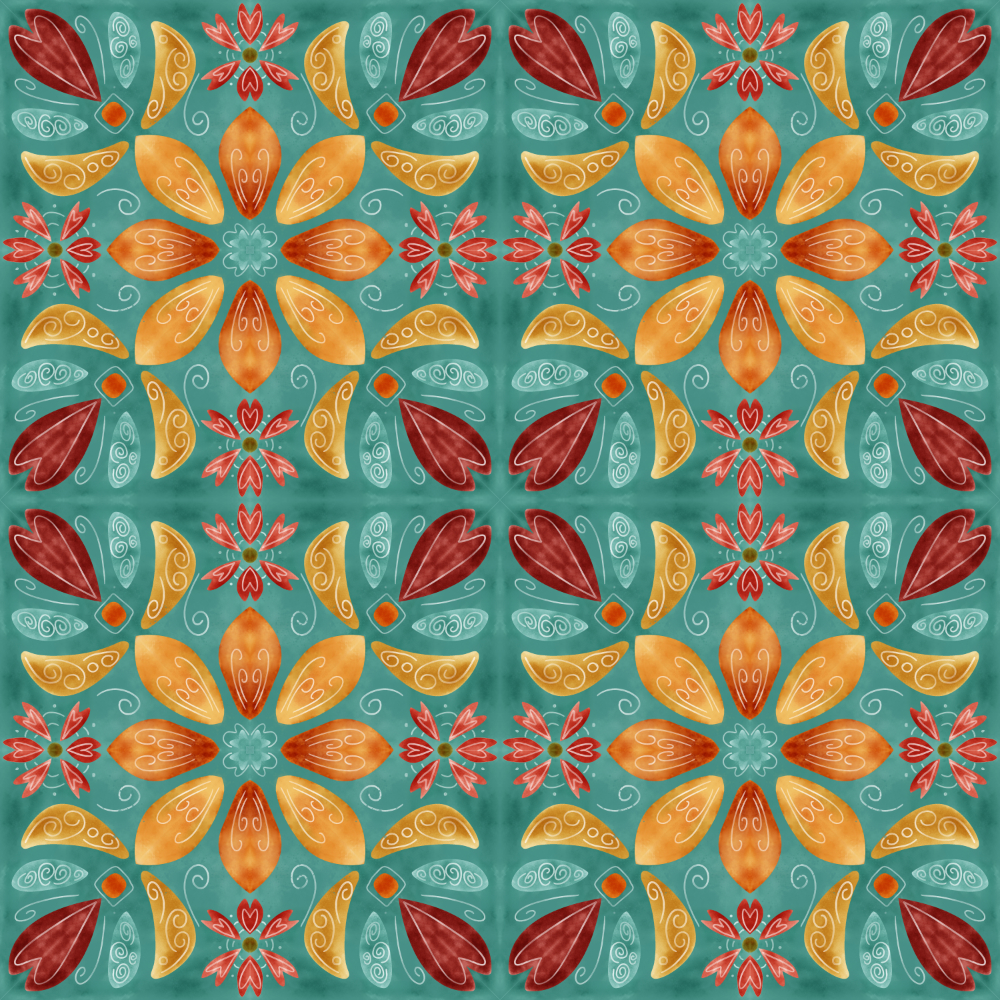
I’m taking Delores Naskrents Affinity Designer MasterClass to learn more about the tools in Affinity Designer. This week I played with watercolor in the Pixel Persona of Affinity. That means that resizing will not be possible, but the result is stunning.
The Process
The entire illustration is created in Affinity Designer.
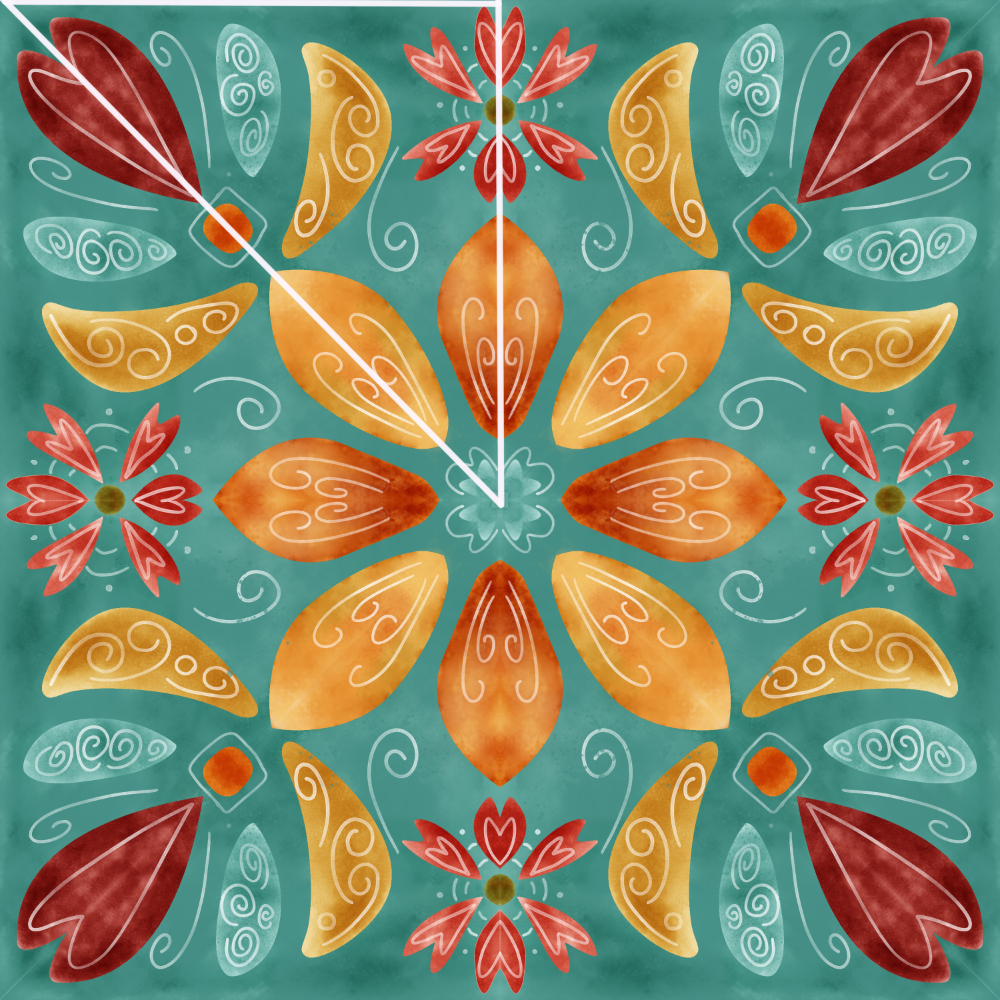
- Template: Full Drop Double Reflection
- In Affinity Vector Persona: Pencil sketch the design.
- Create the triangle symbol in which the reflected motifs will be clipped. If you think of the squares above as 4 squares, the inner half triangle of the upper left square is my pattern, which is eventually reflected across the larger square. See the far right image — the white triangle includes the repeated, reflected design.
- Draw the motifs within the triangle in a base color. Make sure the motifs are converted to curves.
- Place the motifs to be clipped to the triangle. Add this as a symbol.
- Insert the symbol, flip it vertically, and rotate it to complete the upper left square. Once that is done, the design will be automatically repeated across the larger square.
- Switch to Pixel Persona.
- Choose a watercolor brush and a motif in the layers. Paint in dabs to fill the base color with desired colors.
- Repeat for each motif.
- On the template’s overall large square in the bottom layer, watercolor paint the background colors.
- Above all layers, still in the symbol section, use a watercolor round brush to draw in the light folk art details.
- On the middle illustration, I also added a small grained background motif in medium grey above all else, covering the large square area. I duplicated this layer, and placed the top layer on multiply blend mode at about 10% opacity and the lower grained motif on color burn blend mode at 75% opacity to pop out the colors of the overall design. I didn’t need to do that on the first tile because I had kept the watercolor brushes default settings on multiply. In the middle illustration, I had opened the settings on each watercolor brush and placed each brush on normal blend mode. That made the overall effect quite pale and washed out, which I didn’t like. I’ll need to change the settings of the brushes I used back to multiply blend mode in the settings of each brush.
Results
I like Affinity Designer because, in vector persona, I can resize to any size needed, small or larger. But I have to admit, this watercolor technique is beautiful. And, it’s so fun and easy to create because of the reflective nature of the template, so symmetry is our friend!
Give it a try. If you have questions, just ask– or please consider taking Delores Naskrents Affinity Designer MasterClass to learn more about the tools in Affinity Designer.

NOTE:
For the stacked fabric mockup, see Tracey Capone’s Skillshare class here. You’ll learn three types of fabric mockups. For examples, see my project here: Fabric MockUps / Tracey Capone Skillshare Class.
