


Welcome!
Each Wednesday check this blog for a strategy, process, or reflection for illustration with the iPad app ProCreate. This Wednesday Wrap Up , I share a bit more about my process for creating a more 3D effect with texture and blend modes.
Inspiration
The inspiration for this came from an amazing art community subscription, Creative Journey, with Jennifer Nichols of Leila and Po Studio. Jennifer taught a class on creative, folk art moths, which you can view on the first post: Pastel Moths. This time I stuck with the gouache set made for the moths in Jen’s lesson. She also provides several palettes. I used the fourth set of colors.
Jen provides a set of moth brushes so you can see how to create your own or use hers:
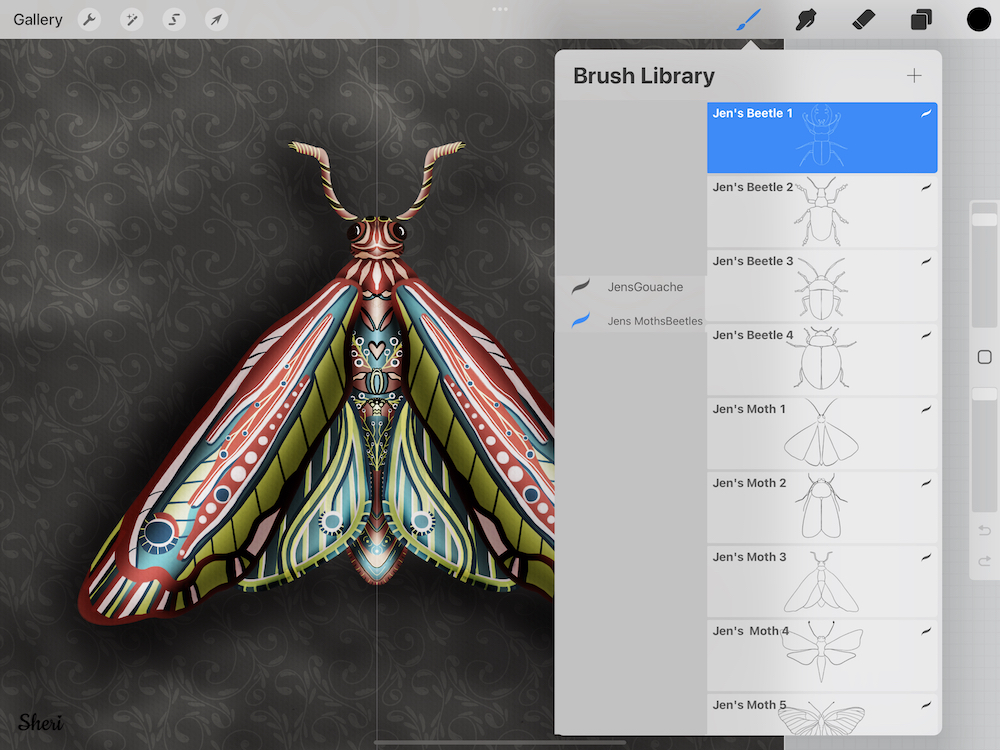
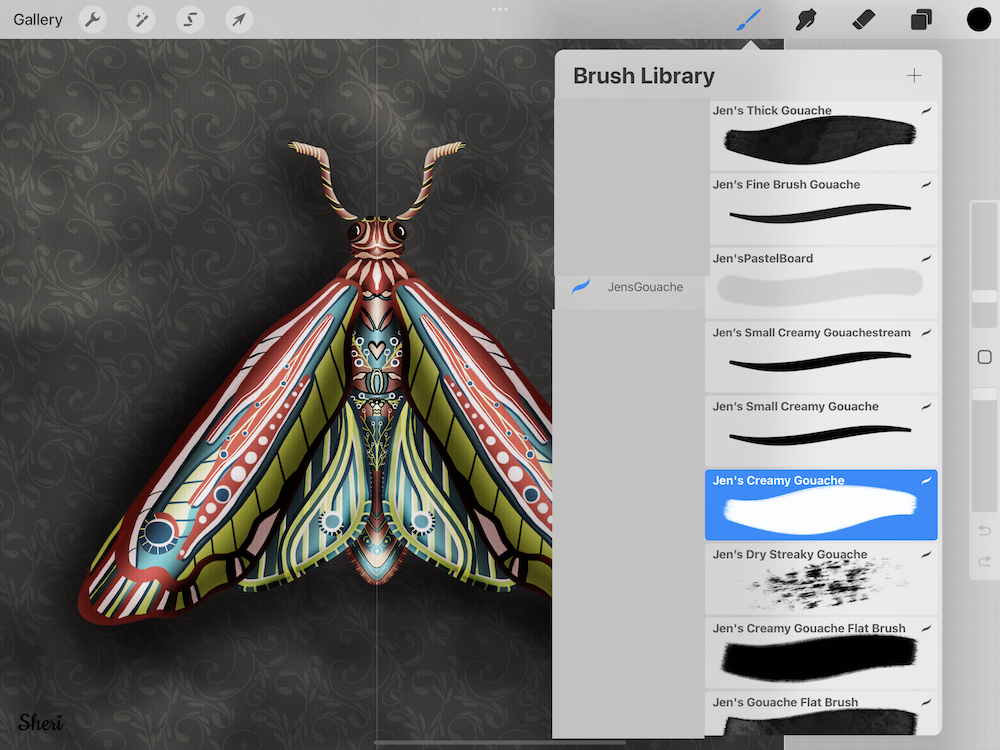
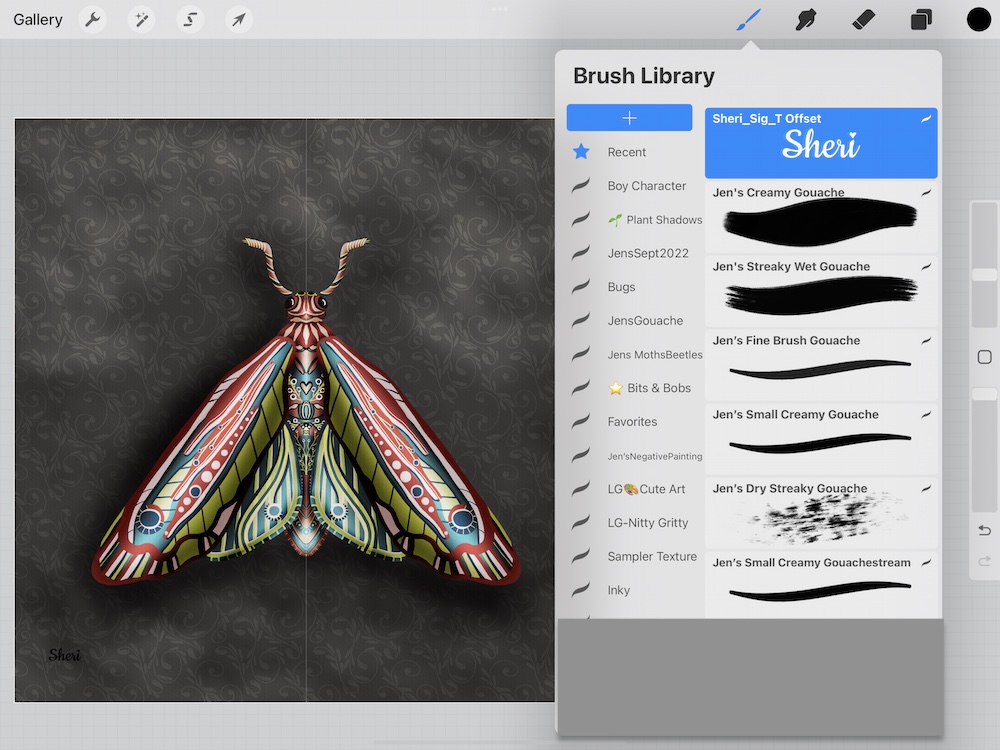
And these are the part of the gouache set that I used for this moth:
With the lesson, some practice, and some samples behind me– I began another moth, starting with the base of a previous one, mostly using these brushes:
Process
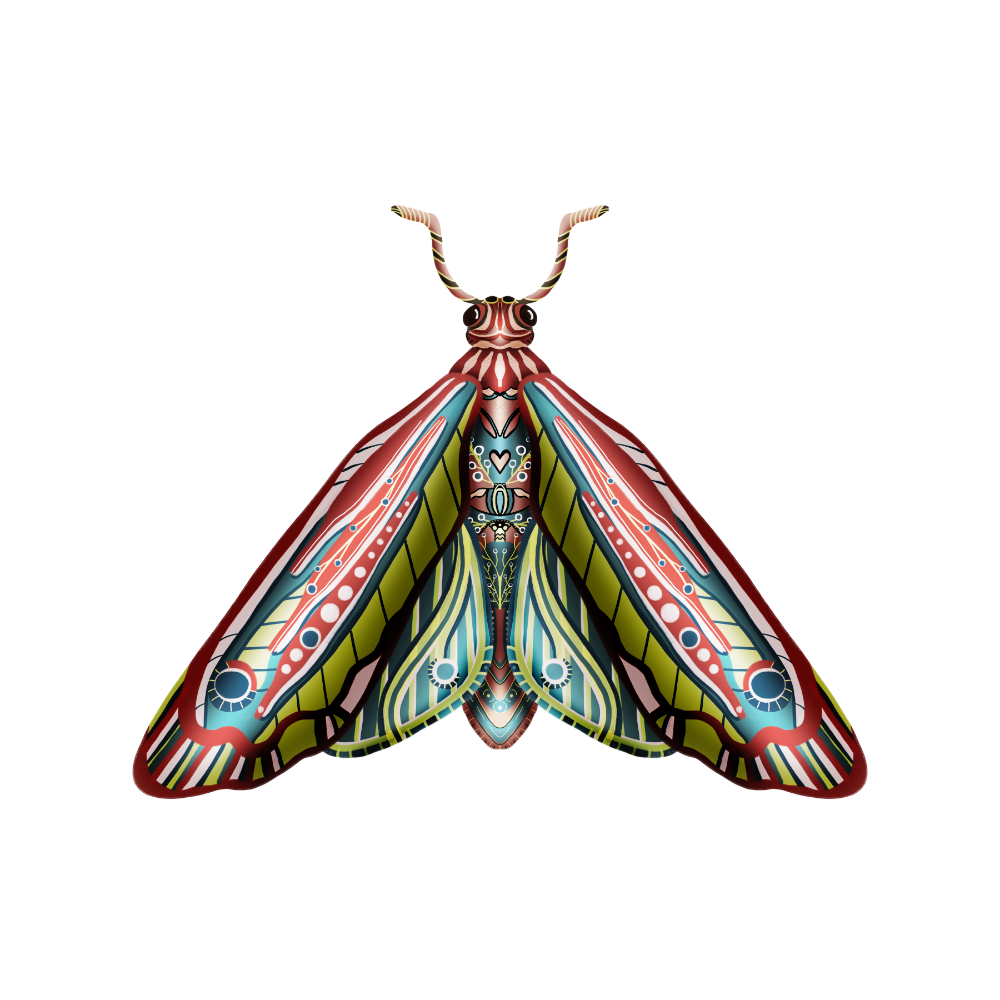
Remember that what was bothering me most about my designs, was the flatness of bugs. Here’s this new moth flat, no dimension:

So I began to create a bit of dimension with a little trick I learned quite a while ago and from several different teachers.
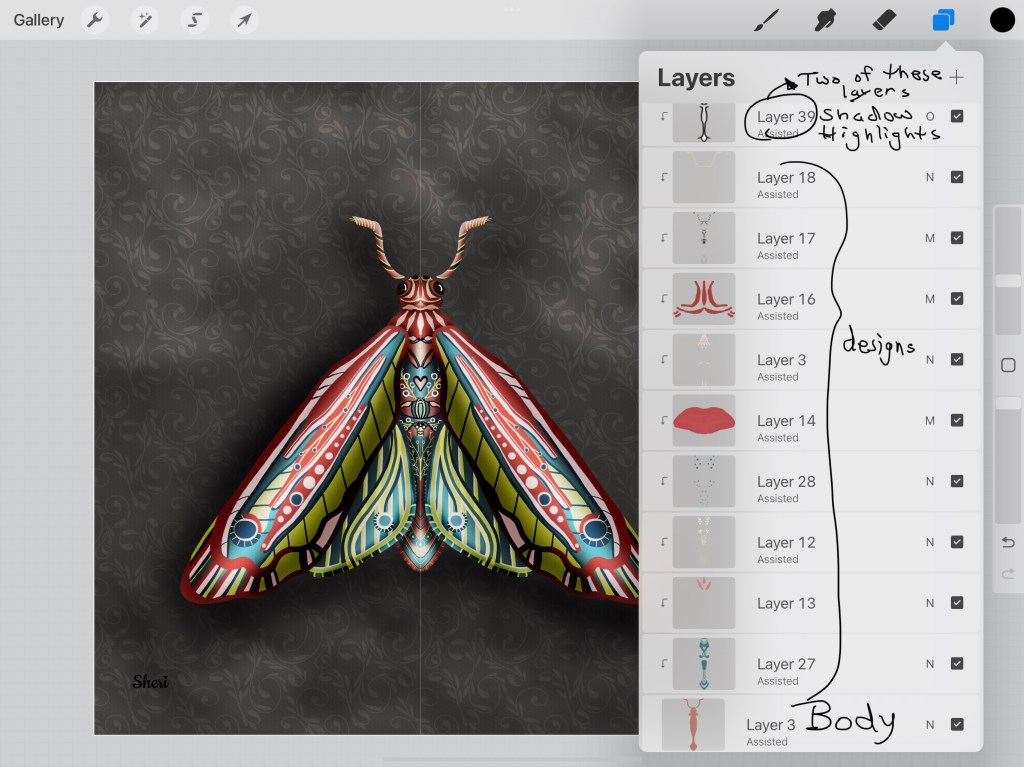
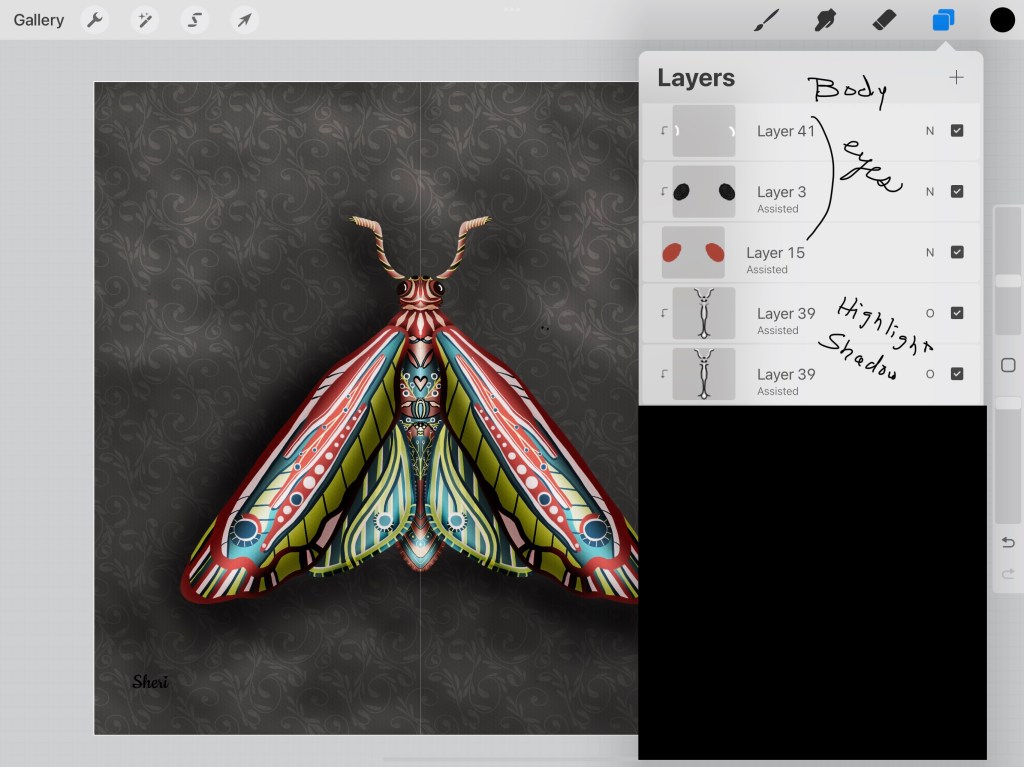
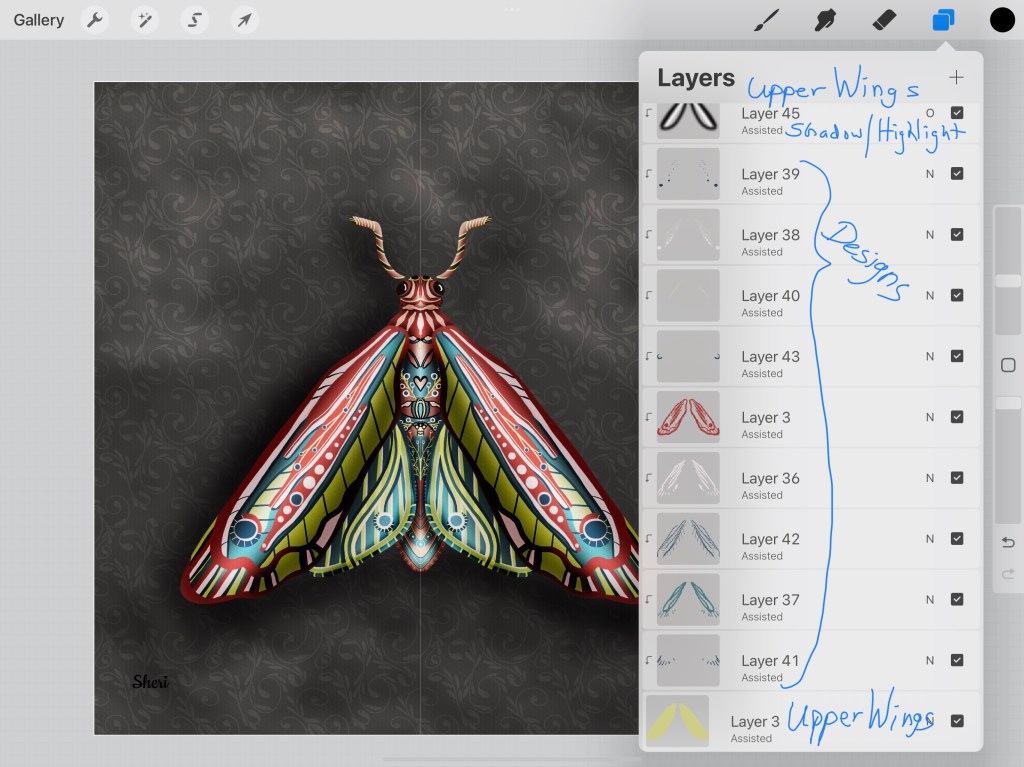
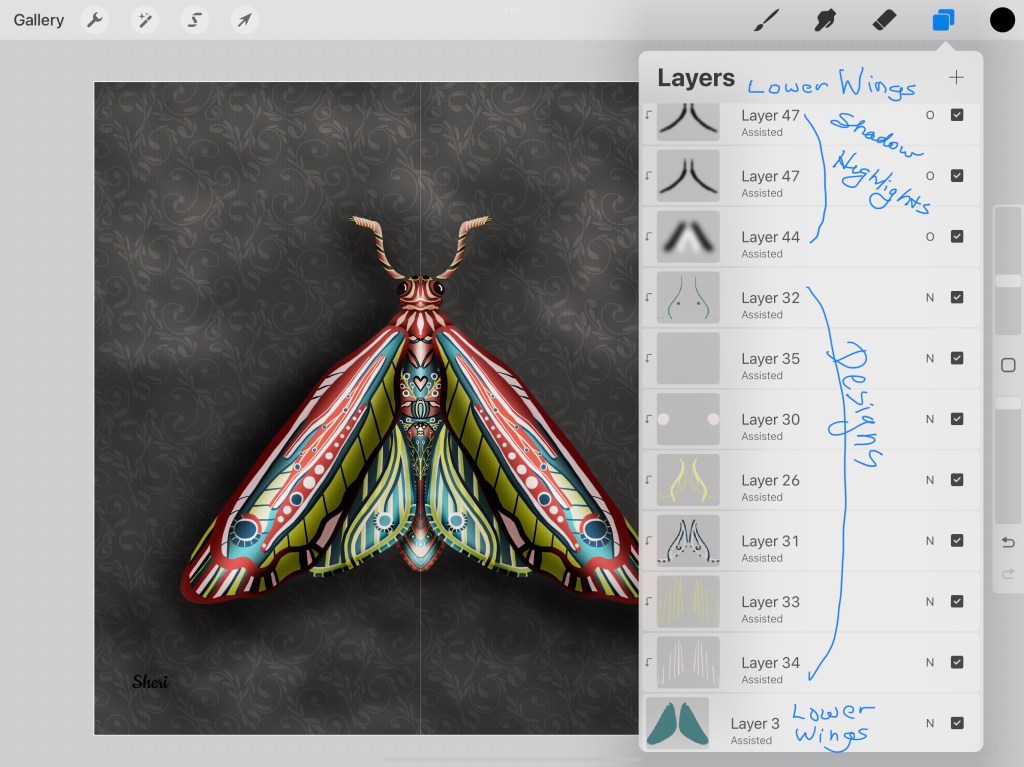
I added a clipping mask to the layer of each main part: the body, the upper wing, and the lower wing.
I set the blend mode to “overlay.”
On each of those clipped layers with black and a one of the gouache brushes [streaking or creamy], I added a stroke where shadows might be. On the same layer in white, I added a stroke where highlights might be. Then, I added a gaussian blur, just two percent, and right before my eyes: a rounded body or wing that pops with dimensional illusion!
The layers

Here’s a video showing a replay of the process. Look for all the elements where I add black/white and then blur. You ‘ll see the dimensional effect at each point. I hope this helps you when you need a bit of “rounding out” of your illustration.
Try It!
Let me know if you try this or if you have another way to bring dimension to your art.
Thank you to Jennifer Nichols, Ali Sale, and the marvelous art community, Creative Journey. I think I would have given up without the support, lessons, and encouragement from fellow artists.
Again, I’d like to share the four main sources of connection that inspire me and give me hope every day. These four online spaces allow me to connect with others and share art, process, and creative options. They are positive, encouraging, and helpful to everyone. Though online and each a different experience, they are a sense of community with art friends.
- Jennifer Nichols Creative Journey — an online subscription community
- Lisa Bardot Artmakers Club — an online subscription community; and her prompts Making Art Every Day [My Previous Posts]
- CLmooc FB group [anyone can join– you are welcome!]
- The DS106 Daily Create [About] [My Previous Posts] Responses on Twitter
I look forward to your sharing, and hope you decide to join some community that will bring you hope and inspiration to create art for the world. Please continue to be a part of the #warmup4art series to learn and enjoy our work together! See my sharing at IG @42Sheri and Twitter @42Sheri.
~ Sheri
~Reflect curiosity and wonder; Go boldly and scatter seeds of kindness.